
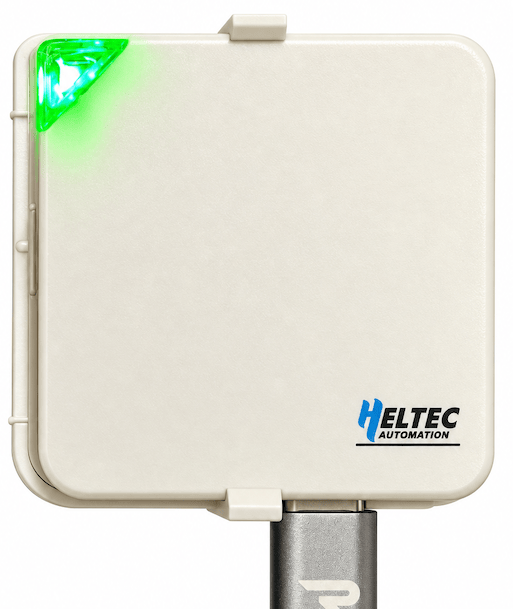
While researching my previous article on how a Single Channel LoRaWAN gateway works, I came across an interesting solution developed by Heltec. Their approach consists of reusing the enclosure and potentially some of the hardware of a small environmental sensor, which already integrates most of the components required to build a Single Channel gateway. They may have adapted or simplified the original hardware to create this dedicated product.
What makes this solution particularly interesting is its price and form factor. At less than $20, it is extremely affordable and compact. Compared to the development boards I used in my previous experiments, it also offers a much cleaner and more professional design, making it better suited for actual deployments rather than just laboratory testing.
I contacted Heltec to purchase one of these devices, but they explained that the product was not currently commercially available. Fortunately, they still had a few units in stock and kindly agreed to send me some samples.
My next step is therefore to deploy the LonaWan Single Channel gateway solution on this device and evaluate how well it performs. Given its low cost, compact size, and installation-friendly design, it looks like a particularly promising platform for the use case I am exploring.
Quick setup
The device is extremely easy to configure and operate. I haven’t been able to identify exactly which version of the OneChannel software is running on it, as Heltec has repackaged the original solution. While I would be interested in knowing what is running under the hood, I must admit that this repackaging is quite well done. For example, it prevents the device from being configured remotely over the network during normal operation, which is a sensible choice for equipment intended to be deployed inside buildings.
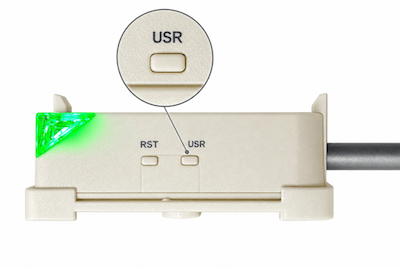
The configuration process itself is straightforward. First, power up the device and press the small “USR” button for a few seconds. The LED will change to yellow, indicating that the device has entered configuration mode. At this point, it starts operating as a Wi-Fi access point, broadcasting a network whose SSID begins with “HT-M00S-xxx”.
Connect to this Wi-Fi network using a smartphone or computer, then open a browser and navigate to 192.168.4.1. This brings you to a simple configuration interface where you can enter the SSID and password of the Wi-Fi network the gateway should connect to.

Unfortunately, the Wi-Fi password is displayed in plain text in this interface. This means that anyone with physical access to the device could press the User button, enter configuration mode, and potentially retrieve the network credentials. This is a questionable security choice, particularly considering the cybersecurity requirements associated with the EU Radio Equipment Directive (RED). The configuration is convenient, but this simplicity comes at the expense of security.
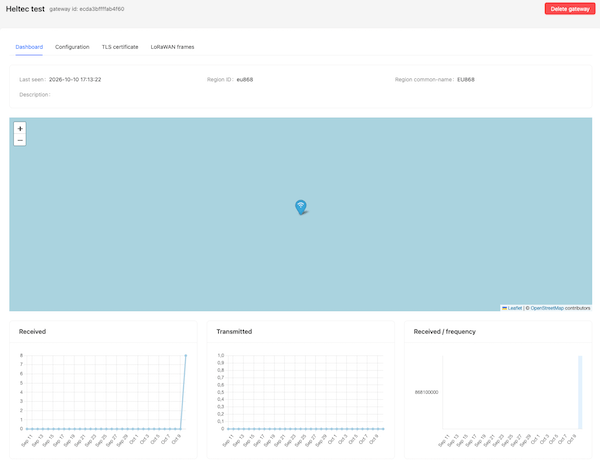
Next, select the Spreading Factor (SF) and operating frequency. These parameters must match the configuration of your LoRaWAN network. I recommend referring to my previous article, where I explain how to configure ChirpStack and determine the appropriate frequency and SF for a Single Channel gateway. One final important detail: make sure to record the Gateway ID displayed in the configuration interface. You will need this identifier to register the gateway in ChirpStack.
As a reminder, for a test in EU868, installing ChirpStack for one-channel is as simple as:
$ git clone https://github.com/disk91/chirpstack_1ch.git
$ cd chirpstack_1ch
$ make install
$ make start
Then you can login as admin / admin on localhost:8180 on your server / machine, tests can be made on WLAN where required.
You then need to specify the address of your ChirpStack server. Both an IP address and a DNS hostname can be used. Select UDP as the communication protocol and configure the destination port. The gateway uses the standard Semtech UDP Packet Forwarder protocol, which typically operates on port 1700. However, this port may differ depending on your deployment, particularly if you are managing multiple network configurations or frequency regions.
Once all the parameters have been entered, simply save the configuration. The device will reboot and attempt to connect to the configured Wi-Fi network and forward packets to your ChirpStack server. If everything works correctly, the LED will turn green, indicating normal operation. You should then start seeing LoRaWAN packets arriving in ChirpStack, provided that compatible devices are transmitting on the configured frequency and Spreading Factor.
You can now register the gateway in your ChirpStack environment using its Gateway ID. Once registered, you should be able to see the incoming LoRaWAN packets without any difficulty.
What’s inside ?
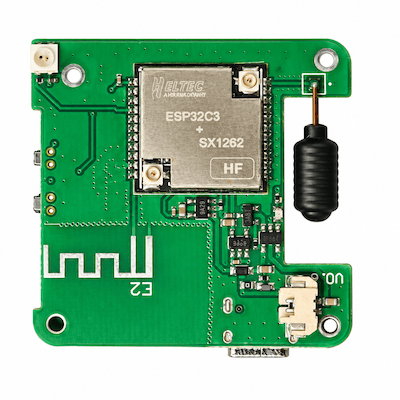
Unsurprisingly, the PCB is extremely simple, as the hardware is designed to perform a single function: operating as a LoRaWAN gateway. A Single Channel gateway essentially requires a microcontroller, typically an ESP32, combined with a LoRa radio transceiver. In this case, Heltec has selected an ESP32-C3 and an SX1262, a modern and well-established combination for this type of application.
Interestingly, the PCB appears to have been originally designed for a different purpose. On the bottom side, there is an unpopulated component footprint, not visible in the picture, which may have been intended for an additional sensor. The board also includes a power management circuit supporting battery operation, suggesting that the original design was intended to support autonomous devices.
In theory, this would make it possible to operate the gateway from a battery. However, battery life would be quite limited. Both the Wi-Fi connection and the LoRa receiver need to remain continuously active, resulting in an estimated current consumption of around 40 mA. With a small LiPo battery that could fit inside the enclosure, we could expect only a few hours of operation, potentially around half a day depending on battery capacity. While the battery management circuitry makes sense for the original hardware design, it offers little practical benefit for this gateway application.
The picture also clearly shows two antennas. The first is a PCB antenna used for 2.4 GHz communication, primarily Wi-Fi in this application. The ESP32-C3 also supports Bluetooth Low Energy, although I haven’t identified any use of Bluetooth in the current firmware or configuration process.
The second antenna, visible on the right side of the board, is a helical antenna dedicated to the 868 MHz LoRa radio interface. I personally like these compact helical antennas, as they offer a good compromise between size, cost, and radio performance. However, their positioning matters. In this design, the antenna is mounted perpendicular to the PCB, with nearby ground planes that may influence its radiation pattern and efficiency. This is not necessarily an optimal RF configuration, and I will need to conduct some range tests to evaluate its actual performance.
That said, achieving maximum radio range is not the objective of this gateway. The intended use case is to provide local coverage over a few hundred meters, connecting nearby devices rather than receiving transmissions from distant nodes. Extending the reception range unnecessarily could increase the number of unrelated packets received and potentially expose the gateway to more overlapping transmissions. With a Single Channel architecture, keeping the coverage focused on the intended devices can actually be beneficial.
Overall, this is a remarkably straightforward hardware design, which largely explains the low price of the product. It would probably be possible to save a few additional cents by removing some components inherited from the original sensor design, particularly those associated with battery operation. However, the current implementation already achieves what we are looking for: a compact, inexpensive, and efficient hardware platform for a Single Channel LoRaWAN gateway.