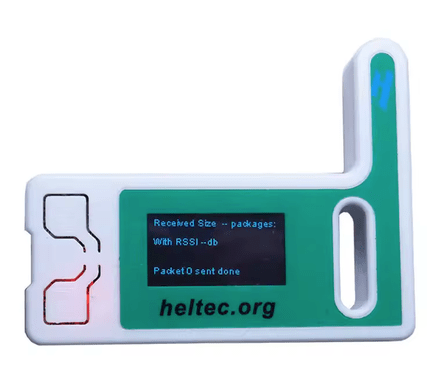
I wanted to explore whether a simple ESP32 could be used to build a LoRaWAN gateway.
To be clear from the start, the goal is not to replace a proper LoRaWAN gateway with an ESP32. Such a setup comes with significant limitations: the ESP32-based gateway will only be able to listen on a single channel. This makes it unsuitable for deploying an actual LoRaWAN network, especially when compared with standard gateways capable of listening simultaneously on multiple channels and spreading factors.
Still, there are situations where such a limited gateway can be useful.
The most obvious one is a home or lab environment. If you have an ESP32-based device that you want to connect to LoRaWAN but do not have a gateway available, building a simple single-channel gateway can be an inexpensive way to get started.
My interest, however, is also in a slightly more professional use case. Within an existing fleet of LoRaWAN devices, there may be a few devices located outside the current coverage area, or devices experiencing persistent coverage issues. Deploying an additional full LoRaWAN gateway to cover only a handful of devices can be relatively expensive and may be difficult to justify or to deploy with B2C products like smart home appliances.
In that situation, a small ESP32-based gateway could provide an interesting temporary solution. It may also be more practical than introducing LoRaWAN relays, considering that relay support and deployment models are still not as mature as conventional gateway-based architectures.
I therefore see this approach primarily as a lightweight or transitional solution: something that can provide local connectivity for a limited number of devices without requiring the immediate deployment of another full-featured gateway.
One more blog post for this
There are already several tutorials available online explaining how to turn an ESP32 into a single-channel LoRaWAN gateway, so I do not want to simply reproduce another one. But I lost a lot of my time finding the right repository to start from. This comes from a 10 year+ old project now rewritten by Semtech and better supported. Instead, the goal here is to go through the complete setup, from the ESP32 gateway itself to its connection to a ChirpStack network server with at the end an industrial perspective.
More importantly, I want to look at how ChirpStack needs to be configured so that packets received through this constrained single-channel gateway can coexist with the rest of a LoRaWAN network using conventional eight-channel gateways. The objective is therefore not only to get packets flowing, but to understand how to integrate this very limited gateway into an otherwise standard LoRaWAN infrastructure.
This is clearly not a new or emerging technology. I have been seeing this type of device demonstrated for several years now, including at trade shows and industry events.
Existing market ready products
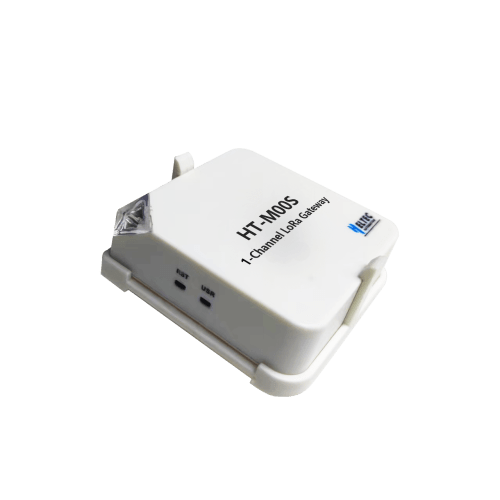
It is worth noting that Heltec also turned this concept into an actual packaged product with the HT-M00S, a single-channel LoRaWAN gateway sold for only $18. At the time of writing, however, the product is out of stock, so it is difficult to know whether Heltec still intends to actively maintain and sell it. Heltec also developed a slightly more capable version, the HT-M00, which provides two channels by integrating two SX1276 transceivers driven by an ESP32. This product is also out-of-stock on Heltec shop but available on aliexpress currently.
The HT-M00 can typically be found for around €45 when purchased individually, while volume pricing can bring the cost much closer to €20 per unit. At that price point, the approach becomes particularly interesting when considering deployment at scale, especially for applications where the cost of a conventional gateway would be disproportionate to the number of devices it needs to cover.
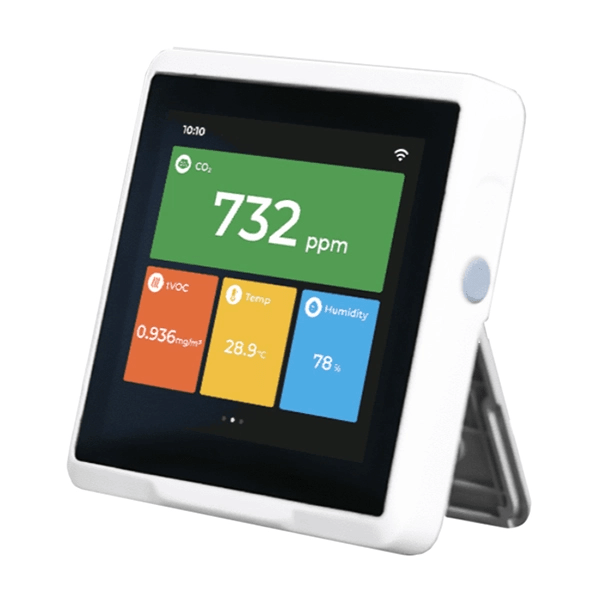
Seeed Studio provides another interesting approach through its SenseCAP Indicator platform. The device combines an ESP32-S3, an SX1262 LoRa transceiver and a display, and Seeed provides an implementation allowing it to operate as a single-channel LoRaWAN gateway. This is a different form factor, but potentially a very practical one for smart-home or local appliance applications, where the gateway functionality can simply be embedded into an existing user-facing device rather than deployed as a dedicated piece of infrastructure.
Limitations
The radio chip used on the gateway side is essentially a device transceiver (SX1276 / Sx1262). It is primarily designed to receive on a single channel and, under normal operating conditions, on a single spreading factor. This is also where it provides its best receive performance.
Running a LoRaWAN gateway on a single channel is entirely possible, although it comes with the obvious risk of missing a significant number of packets, particularly during the join procedure (as ADR can force the frequencies later). Operating with a single spreading factor is more problematic. Depending on the end device and its configuration, the spreading factor used for the initial join requests may not match the one the gateway is listening to. In that case, the gateway will simply never receive those packets.
Once the device has successfully joined, this becomes easier to manage. The network can control the data rate used by the device, allowing us to keep it on a data rate corresponding to the spreading factor supported by the gateway and prevent it from moving to an SF that the gateway would no longer be able to receive.
The older One Channel Gateway project, designed around the SX1276, had an interesting feature that is particularly relevant here: it could provide a form of multi-SF reception using Channel Activity Detection (CAD). The principle was to run CAD across the different spreading factors in order to determine which SF matched an incoming LoRa transmission.This approach came with a performance penalty, particularly in terms of sensitivity and reception range, but it had the significant advantage of allowing a single-channel gateway to receive devices using different spreading factors.
Unfortunately, the newer One Channel Hub implementation does not appear to support this mechanism. This is a significant limitation, as it reduces the range of use cases where this type of gateway can realistically be deployed.
For laboratory use, or even for some limited field deployments, this reduction in range can be perfectly acceptable when balanced against the economic benefits of such a lightweight gateway.
Gettting started using the precompiled binaries
Semtech provides precompiled binaries in its One Channel Hub repository, which saves quite a bit of time when getting started. We may later find that we need to modify the code and build our own firmware, but for now, there is no reason to add that complexity. The first step is simply to deploy the precompiled version and see how far we can get with it.
For this setup, I am using a Heltec WiFi LoRa 32 V3, but I’m running V3.2 (spoil, it will not work with version 3.2 yet, see above). The precompiled firmware comes as three separate binary files that need to be flashed to the board: the partition table, the bootloader, and the LoRa Hub application itself. The latter is the board-specific binary corresponding to the GPIO configuration of the WiFi LoRa 32 V3. The files are located in the bin directory.
esptool.py --chip esp32s3 -p /dev/cu.usbserial-0001 -b 460800 --before=default_reset --after=hard_reset write_flash --flash_mode dio --flash_freq 80m --flash_size 2MB 0x0 heltec_wifi_lora_32_v3_bootloader.bin 0x10000 heltec_wifi_lora_32_v3_lorahub.bin 0x8000 heltec_wifi_lora_32_v3_partition-table.bin
The firmware implements the standard provisioning mechanism provided by ESP-IDF. It relies on Espressif’s ESP Provisioning mobile application, which needs to be installed on a smartphone before starting the configuration.
Provisioning is performed over Bluetooth Low Energy (BLE). The ESP Provisioning application connects to the device over BLE and transfers the Wi-Fi credentials it needs to connect to the local network. There is therefore no need to hardcode the SSID and password into the firmware.
To put the device into provisioning mode, press the Reset button to reboot it. Immediately after startup, press and hold the Prog button for a few seconds. The device should then switch to provisioning mode and become available to the mobile application over BLE.
When the gateway starts, the serial console displays the information required to initiate the provisioning process, including a link or QR code that can be used from the ESP Provisioning application. In practice, you simply need to monitor the serial console during startup and use the provisioning information displayed there.
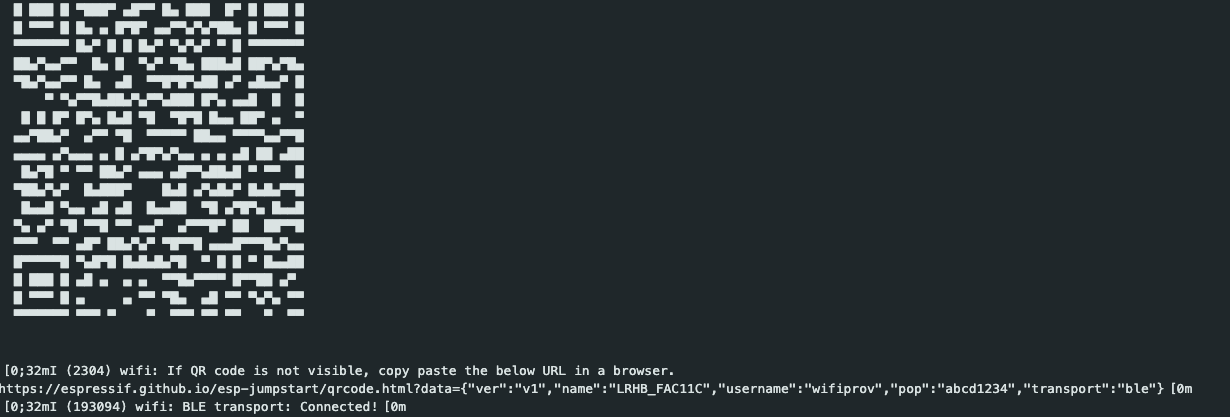
From there, the ESP Provisioning application can be used to select the Wi-Fi network and securely transfer its credentials to the gateway. Once provisioning is complete, the ESP32 can connect to the network using the stored configuration.
You can also just run the mobile application, click on “I don’t have QR code” fin the device named “LRHB_xxx” and connect with pincode abcd1234
In the log you can get the IP address for the device
17:30:38.261 ->[0;32mI (233714) wifi: got ip:10.0.X.X[0m
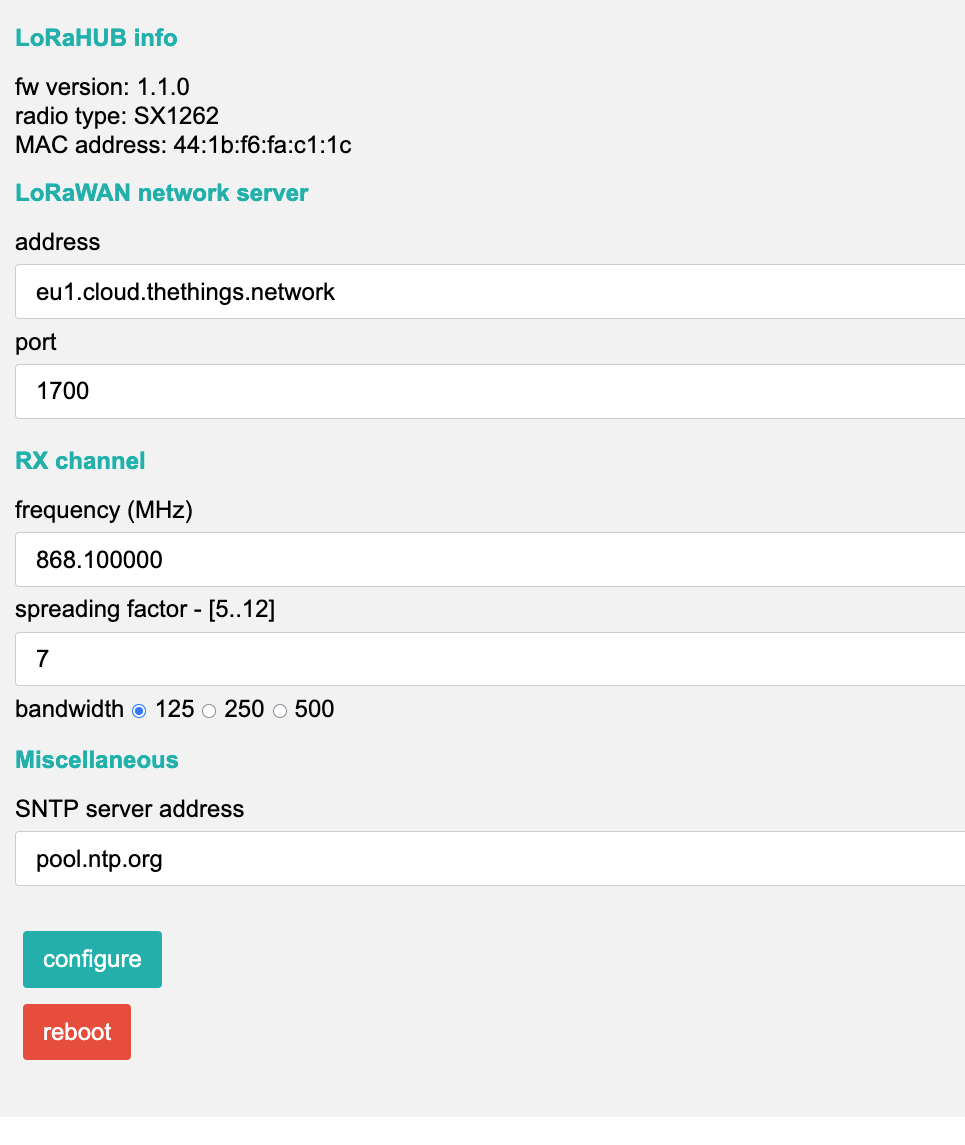
Now you can connect to the the configuration server located on http://deviceIp:8000
This allows to setup your packet receiver and LoRa parameters.
The precompiled binary does not work correctly with revision 3.2 of the Heltec board.
The first visible issue is that nothing is displayed on the screen, but the problem goes further than that: no LoRa data is transmitted, and after some time the device eventually reboots after triggering the watchdog.
This suggests that revision 3.2 introduces some hardware-specific differences that are not properly handled by the precompiled firmware from original repo.
At this point, relying on the provided binary is no longer sufficient, so the next step is to build the firmware from source. This will give us more control over the board configuration and make it possible to adapt the code to the specific characteristics of this hardware revision.
Build the LoRaWan 1-channel hub (gateway)
install the ESP-IDF environement
You need to have recent CommandLineTools installed on your mac. eventually update it from https://developer.apple.com/download/all/ and get Command Line Tools for Xcode 26
$ brew install cmake ninja dfu-util ccache git

$ brew tap espressif/eim
$ brew trust espressif/eim
$ brew install eim
$ eim install -i v5.3.2
$ source "~/.espressif/tools/activate_idf_v5.3.2.sh"
Prepare the one channel hub project
$ git clone git@github.com:disk91/one_channel_hub.git

$ cd one_channel_hub/components/radio_drivers
$ git clone -b v2.3.2 https://github.com/Lora-net/sx126x_driver.git sx126x_driver
$ git clone -b v2.3.2 https://github.com/Lora-net/llcc68_driver.git llcc68_driver
$ git clone -b v2.4.1 https://github.com/Lora-net/SWDR001.git lr11xx_driver

$ cd ../../lorahub
$ idf.py set-target esp32s3
$ idf.py menuconfig
CONFIGURE, BUILD and flash PROJECT
Now we can setup the build to be made with the graphical menu config. The main configuration menu is LoRaWAN one-channel hub config.
- Select the Board type (Heltec WiFi LoRa 32 v3.2)
- Select the LoRa radio type (sx1262)
- Enable OLED Display
- Configure the LoRa channel and SF and the LNS name and port in Packet Forwarder Configuration
Now we can build and flash (adapt your serial port)
$ idf.py all
$ idf.py -p /dev/cu.usbserial-0001 flash
The device is ready to be commissioned to access WiFi and configured like for the binary above.
Code
In case you want to modify the source code, to compile, flash and display serial console:
$ idf.py build flash monitor
To quit the monitor mode with a mac, type CTRL + T then CTRL + X
Setup Chirpstack
We now need to configure ChirpStack so that it can receive and process data coming from this gateway. This requires a slightly unusual configuration, as we do not want the end devices to operate across the full set of frequencies normally available in the LoRaWAN region. We also need to make sure that ADR does not eventually move a device to a configuration that our gateway can no longer receive. In our case, both the radio channel and the spreading factor are fixed.
To make the setup easier to reproduce, I created a GitHub project that deploys a dedicated ChirpStack instance with the required configuration already in place. For the purpose of this demonstration, this instance only manages this specific single-channel setup.
This does not mean that a separate ChirpStack instance is required in a real deployment. On an existing ChirpStack infrastructure, we could instead define an additional region dedicated to these gateways, for example an EU868_1ch configuration. It could use its own port and coexist with the standard EU868 configuration used by conventional multi-channel gateways. This would make it possible to integrate a small number of these single-channel gateways into a much larger fleet without changing the configuration of the existing gateways.
The standalone instance used here is therefore mainly a convenient way to keep the demonstration simple and reproducible. The same principle can easily be adapted to an existing ChirpStack deployment.
Installation itself is straightforward and can be done by following the steps below (you need to have docker installed).
$ git clone https://github.com/disk91/chirpstack_1ch.git
$ cd chirpstack_1ch
$ make install
$ make start
Then you can connect to the chirpstack with a ssh port forward
$ ssh -L 8180:localhost:8180 user@your-server
And connect to Chirpstack with default admin / admin cerdentials with your browser on http://localhost:8180
Add your gateway to chirpstack
You can verify that packets are actually reaching ChirpStack from the gateway by checking the traffic received by the Gateway Bridge.
$ docker logs -f chirpstack_1ch-chirpstack-gateway-bridge-eu868-1
This may display lines like this on regular basis (30 seconds):
time="2026-08-29T11:55:39.133144747Z" level=info msg="integration/mqtt: publishing event" event=stats qos=0 topic=eu868/gateway/441bf6fffefac11c/event/stats
In this line you can extract the gateway ID (441bf6fffefac11c for my gateway) and in Chirpstack gateway menu add this ID. You will be able that way to see your gateway statistics and the messages seen by this gateway.
Experimentation
For the experiment, I configured an end device to transmit periodically, using a 60-second interval, and initialized it at DR5 so that the join procedure could complete successfully with the gateway configuration.
Once connected, the device receives an ADR configuration setting the number of transmissions, NbTrans, to 5. This value is controlled through the ADR parameters and could potentially be decreased / increased if required.
This parameter is particularly important in our single-channel setup. Even if we cannot explicitly lock the end device to a single channel, it will keep the three default EU868 channels enabled and select between them for its uplink transmissions. Since our gateway is only listening on 868.1 MHz, transmissions sent on the other two default channels will simply not be received.
Using NbTrans = 5 therefore increases the probability that the same uplink is transmitted across multiple channel selections and that at least one of those transmissions occurs on 868.1 MHz, multiple times, where our gateway can receive it. This is obviously not equivalent to actually locking the device to a single channel, but it provides a practical workaround for this experiment.
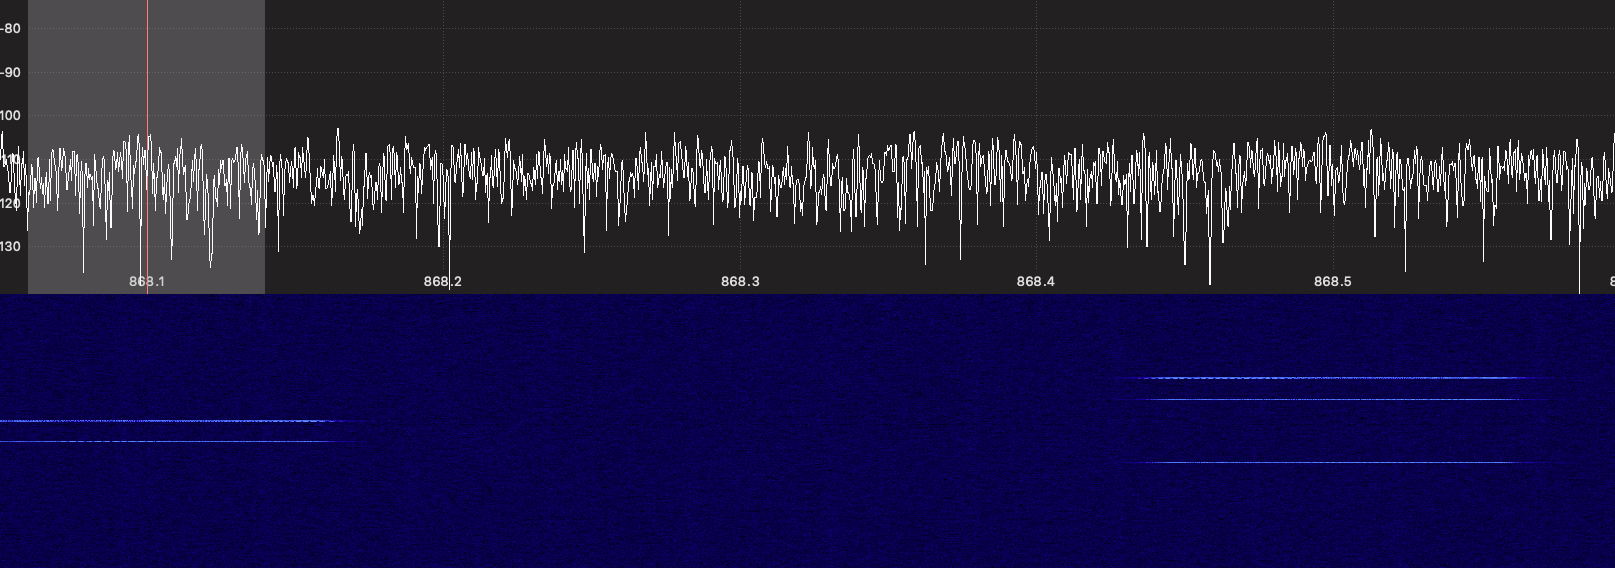
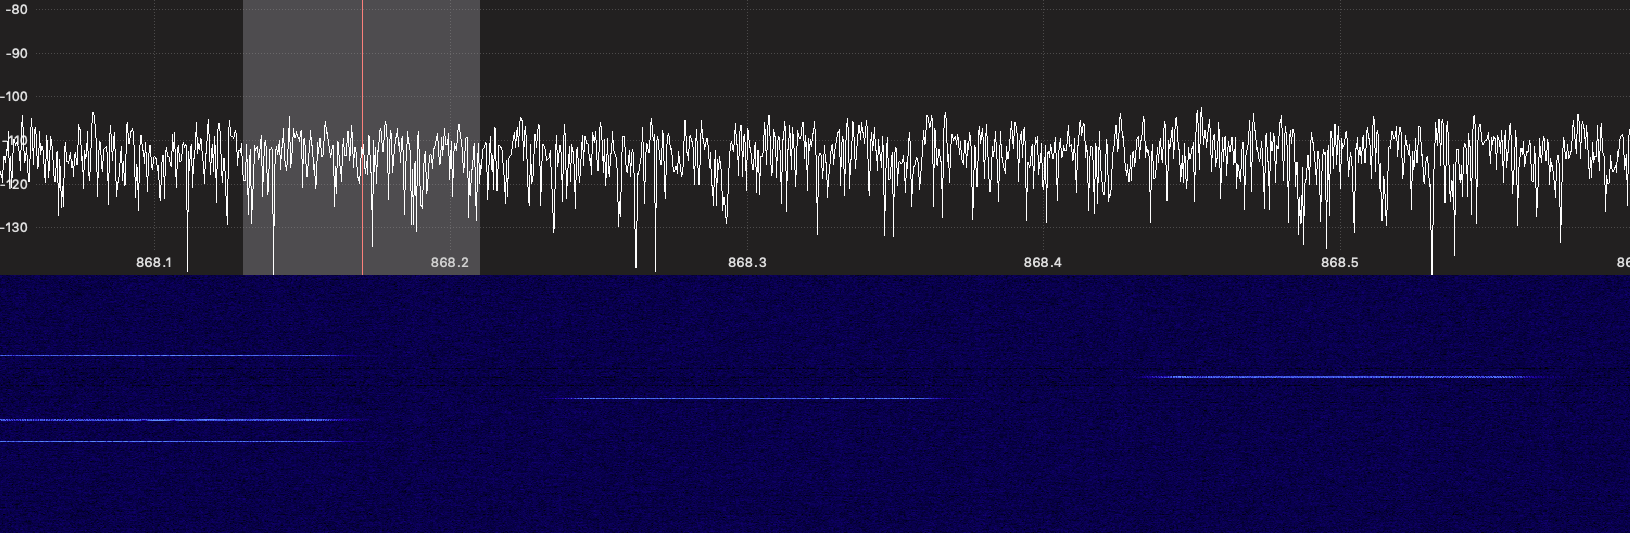
There is a trade-off here as well. Increasing the number of transmissions directly increases airtime, so the resulting traffic needs to be considered carefully with respect to duty-cycle limitations. This becomes even more relevant with a short reporting interval such as the 30 seconds used for this test ; but the purpose is to use it for device transmititng 2-3 times a day.
With this configuration in place, we can start observing the messages received by ChirpStack. In addition to regular uplink events, we can see fCnt retransmission events corresponding to repeated transmissions of the same LoRaWAN frame.
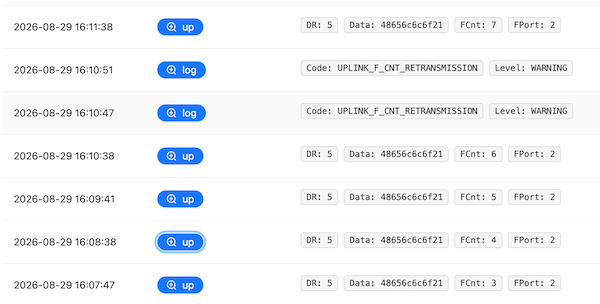
These events are actually useful for evaluating the behavior of the setup. They give us some visibility into both the retransmissions that successfully reach the gateway and, indirectly, the packets that are missed. Any transmission sent on a channel other than 868.1 MHz remains completely invisible to ChirpStack, simply because the single-channel gateway is not listening there.
The first frames are the one with most of chance to be lost (arriving on a different frequency that the previous join in general) due to the ADR NbTrans parameter not yet set to the device.
First results
With this configuration, the experiment shows a packet loss of approximately 15%. This may initially seem relatively high, but considering the constraints of the setup, it is actually a fairly reasonable result.
The most obvious limitation is the complete lack of frequency diversity. The gateway is listening on a single frequency, so there is no possibility of benefiting from transmissions received across multiple channels as with a conventional LoRaWAN gateway. Repetitions provide some degree of time diversity, but that is essentially all we have here. In practice, the number of repetitions effectively observed also varies from one frame to another.
Under these conditions, a packet loss rate of around 15% is therefore not particularly surprising. More importantly, it gives us a useful baseline for understanding what can realistically be expected from such a constrained gateway.
There are several parameters that could be explored further. Increasing the number of repetitions could potentially improve the reception rate, at the cost of additional airtime and duty-cycle consumption. It would also be interesting to repeat the experiment using a higher spreading factor. All the measurements presented here were performed at SF7, so there is still room to investigate how the additional link budget provided by higher spreading factors affects the results.
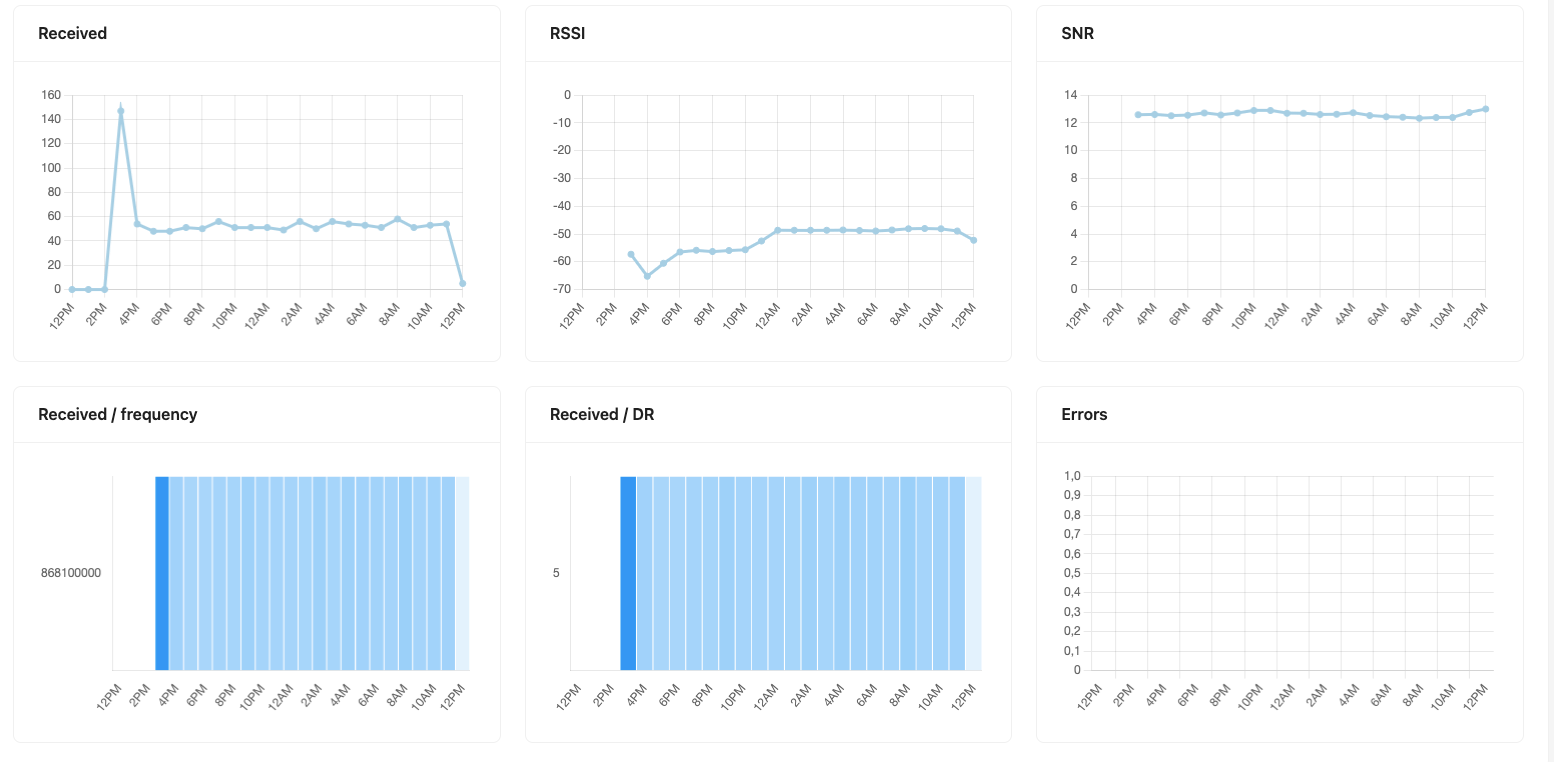
Looking at 12 hours stats, reception is quite stable (2 devices are about 15 meters distance in house with different floors involved). Initial pic are first trial, last drop is current hour just starting.